Originally Posted by
venk
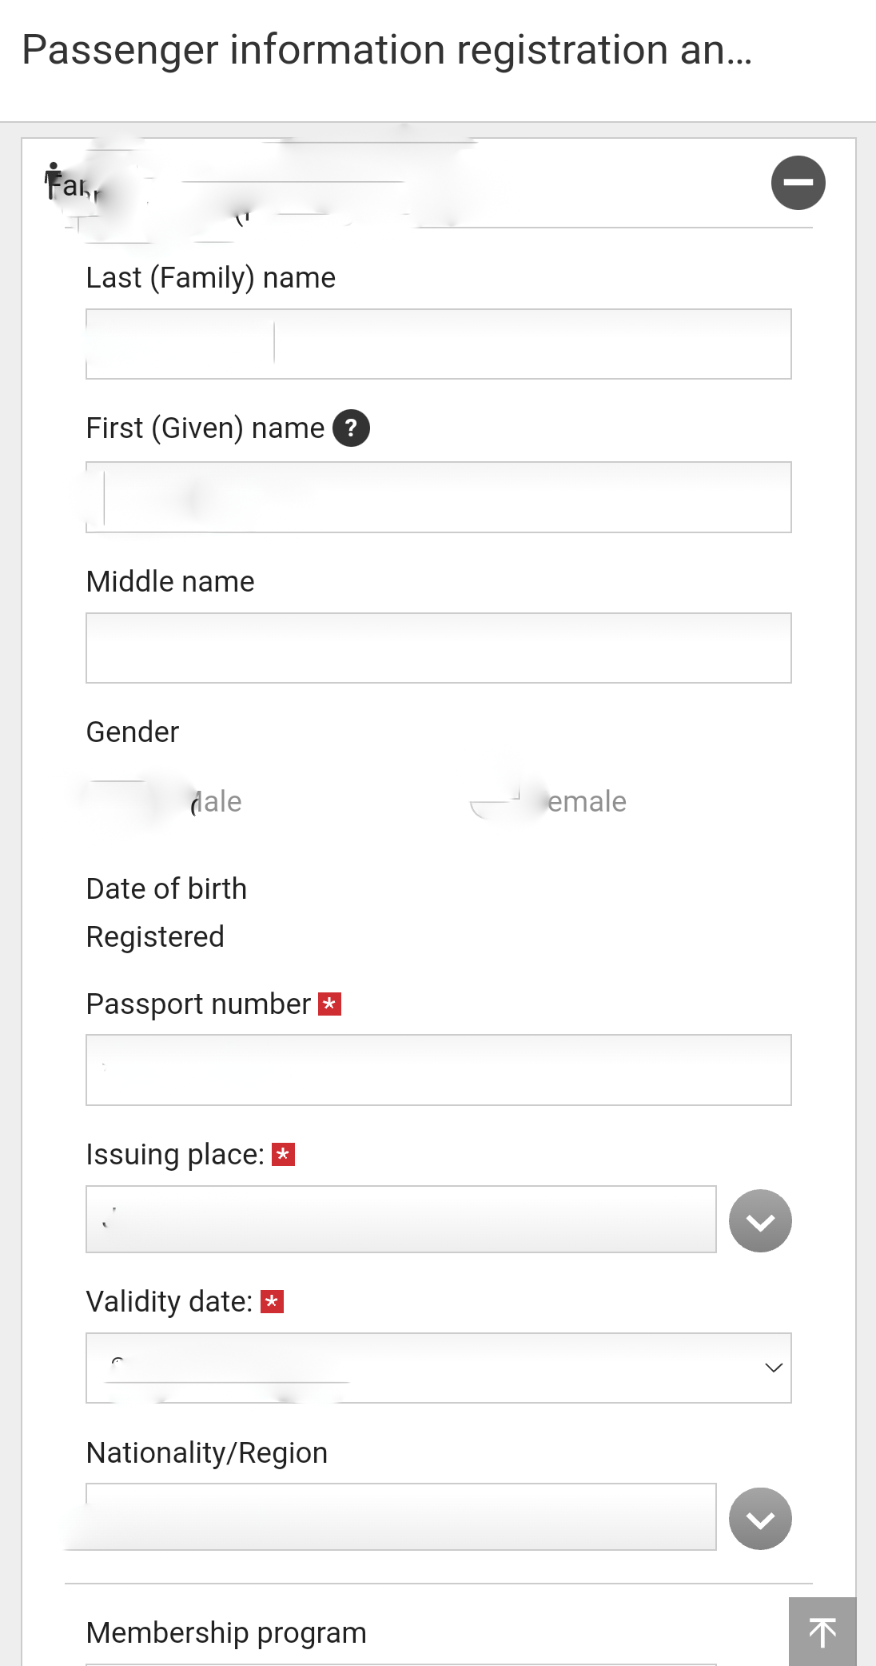
When you click on that + next to the passenger name, do you actually see the field for entering the passport number?
As noted earlier, the passport number info does not appear in that section perhaps if the booking is not owned by JAL. Even though it says Register of passport information on the button and the text says “Please input the passport information…” when you go to that form for the passenger, the only fields available are
Membership program, email address and phone number for flight notification and destination information (address of first night stay). This is what I see in mine. This is why the OP was struggling.
This is the same form as when clicking other services.
I still haven’t figured out how to have the itinerary stick to the app once accessed. It only gives the next flight departure info on home screen and when I select check, change or cancel, I am taken to a form where I have to enter the date of travel, flight number, first and last name AND PNR to access the itinerary and if you exit that at any time, you have to do the same thing again entering all that information to access it. None of those forms have a cancel button and if you click the X at the top, it completely exits the itinerary section and you are back to square one on home page.
Same thing with even seat selection, if you don’t want to change seat when you are in the form for a particular leg, there is no cancel or next leg. You have to press Save even if you have not changed the seat. May be that is cancel for JL if you didn’t change the seat, but if you have used enough apps, you know not to click an action button that looks like it redoes the action. These are all simple UI/UX guidelines that has been ignored by JL product managers and hence why I think it is the worst app of any major airline.
I registered for JMB just to see if I can get my itinerary to stick, no luck.
May be different if the booking is via JL or if the booking is associated with JMB.
Yes, I see fields for the passport information there. And I saved my information to make sure it actually sticks. Though needed a bit of photo editing before uploading to unstick it.