


 Sep 16, 2013, 3:40 pm
Last edit by: gfunkdave
I have copied the first post in this thread to this wiki so anyone can edit it.
************************************************** *******
A few people have asked in various threads, and I though that this might be a good opportunity to have some instructions for the various image hosting services out there on how to present their images on the TPF forum. I'm going to include the couple responses I've already drafted, but if people have info for ones I haven't included feel free to suggest the provider to me and/or write up the instructions.
S.
If you're having trouble posting images and cannot seem to figure out why they aren't showing up in the post, make sure to check your profile settings. There is an option to display images or not, and that may be the source of the problems. To get to the setting, click on the My FlyerTalk link, then on the Edit Options link. On that page scroll down and make sure that the check box is selected next to the option "Show Images (including attached images and images in [IMG] code)" and save the settings. Hopefully that will fix things.
Update:
Just wanted to add a welcome to folks who are coming over to this thread from some of the other fora that recently had photo embedding enabled. If you're having any problems or want to include details about a new hosting service please feel free to post in this thread and/or PM me.
************************************************** *******
A few people have asked in various threads, and I though that this might be a good opportunity to have some instructions for the various image hosting services out there on how to present their images on the TPF forum. I'm going to include the couple responses I've already drafted, but if people have info for ones I haven't included feel free to suggest the provider to me and/or write up the instructions.
S.
- Upload directly to FlyerTalk
- flickr
- FlyerTalk Gallery
- FlyerTalk Photo Albums
- fotiki
- Generic Hosting
- ImageShack
- PhotoBucket
- Photoshop Express
- Picassa Web Albums
- SmugMug
- WebShots
- Zenfolio
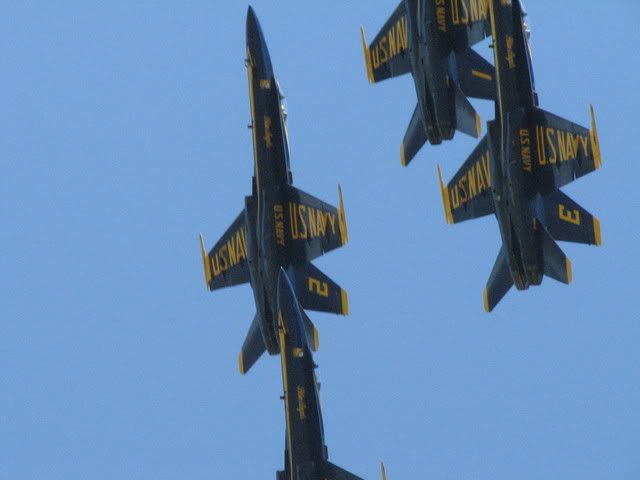
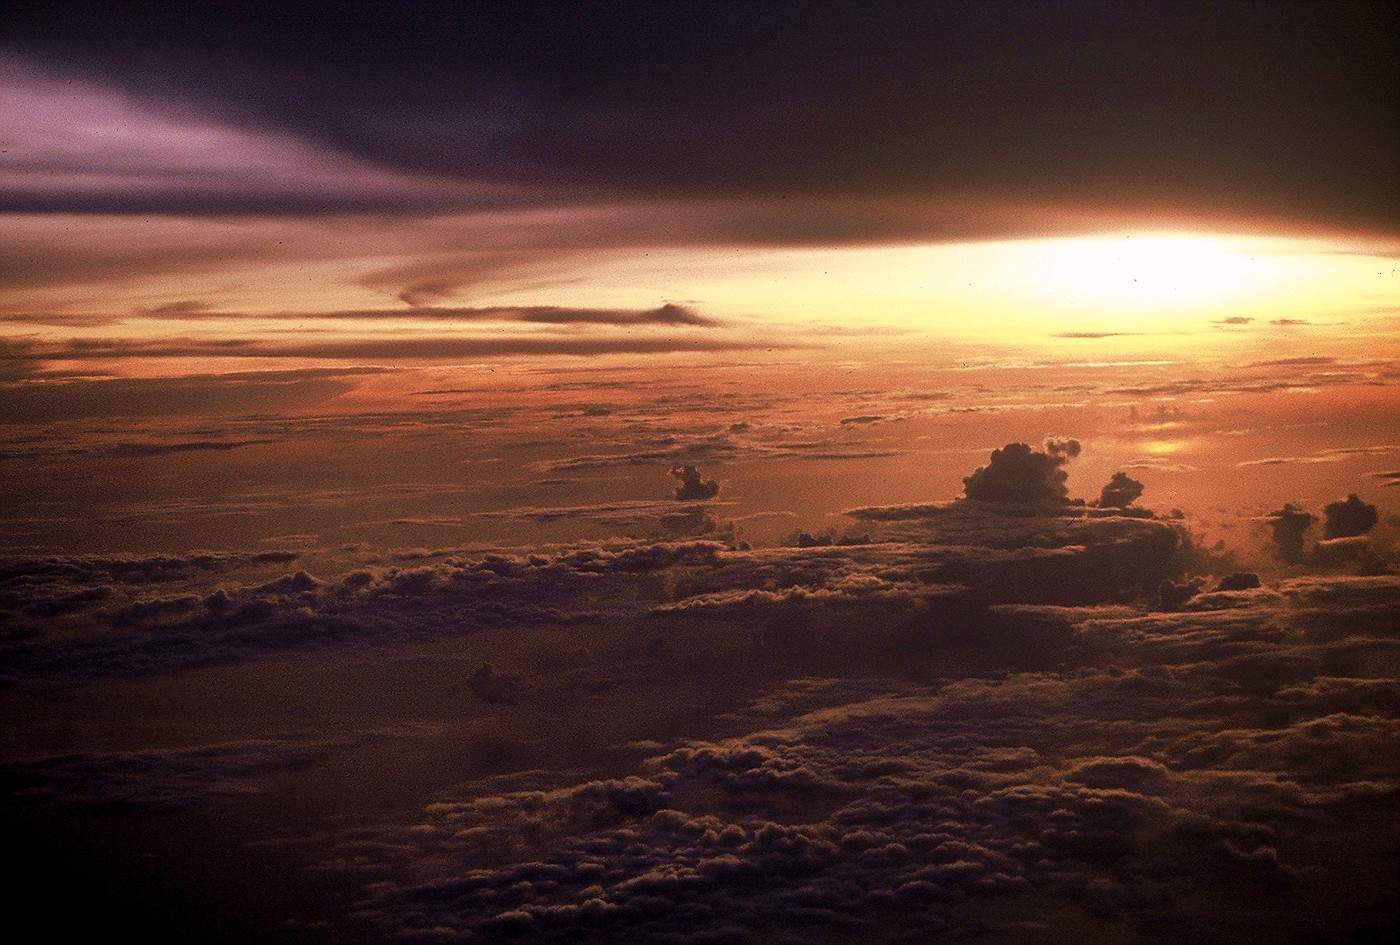
- Why I love flying, in an image...
- View from Your Hotel Room
Folks Still Taking Photos Just After Takeoff or Before Landing?- Takeoff and Landing Photos/Videos
- Post your golfscapes here...
- HDR Photos
- Planespotting
- Wildlife
- You and your Camera
- Under the sea (underwater images)
- http://www.flyertalk.com/forum/trave...interiors.html
If you're having trouble posting images and cannot seem to figure out why they aren't showing up in the post, make sure to check your profile settings. There is an option to display images or not, and that may be the source of the problems. To get to the setting, click on the My FlyerTalk link, then on the Edit Options link. On that page scroll down and make sure that the check box is selected next to the option "Show Images (including attached images and images in [IMG] code)" and save the settings. Hopefully that will fix things.
Update:
Just wanted to add a welcome to folks who are coming over to this thread from some of the other fora that recently had photo embedding enabled. If you're having any problems or want to include details about a new hosting service please feel free to post in this thread and/or PM me.

How (and where) to embed your pictures in the Travel Photography forum
Oct 21, 2007, 8:18 am
#1
A FlyerTalk Posting Legend
Original Poster
Join Date: Apr 2001
Location: PSM
Posts: 69,232
How (and where) to embed your pictures in the Travel Photography forum
A few people have asked in various threads, and I though that this might be a good opportunity to have some instructions for the various image hosting services out there on how to present their images on the TPF forum. I'm going to include the couple responses I've already drafted, but if people have info for ones I haven't included feel free to suggest the provider to me and/or write up the instructions.
S.
If you're having trouble posting images and cannot seem to figure out why they aren't showing up in the post, make sure to check your profile settings. There is an option to display images or not, and that may be the source of the problems. To get to the setting, click on the My FlyerTalk link, then on the Edit Options link. On that page scroll down and make sure that the check box is selected next to the option "Show Images (including attached images and images in [IMG] code)" and save the settings. Hopefully that will fix things.
Update:
Just wanted to add a welcome to folks who are coming over to this thread from some of the other fora that recently had photo embedding enabled. If you're having any problems or want to include details about a new hosting service please feel free to post in this thread and/or PM me.
S.
- flickr
- FlyerTalk Gallery
- FlyerTalk Photo Albums
- fotiki
- Generic Hosting
- ImageShack
- PhotoBucket
- Photoshop Express
- Picassa Web Albums
- SmugMug
- WebShots
- Zenfolio
- Why I love flying, in an image...
- View from Your Hotel Room
Folks Still Taking Photos Just After Takeoff or Before Landing?- Takeoff and Landing Photos/Videos
- Post your golfscapes here...
- HDR Photos
- Planespotting
- Wildlife
- You and your Camera
- Under the sea (underwater images)
- http://www.flyertalk.com/forum/trave...interiors.html
If you're having trouble posting images and cannot seem to figure out why they aren't showing up in the post, make sure to check your profile settings. There is an option to display images or not, and that may be the source of the problems. To get to the setting, click on the My FlyerTalk link, then on the Edit Options link. On that page scroll down and make sure that the check box is selected next to the option "Show Images (including attached images and images in [IMG] code)" and save the settings. Hopefully that will fix things.
Update:
Just wanted to add a welcome to folks who are coming over to this thread from some of the other fora that recently had photo embedding enabled. If you're having any problems or want to include details about a new hosting service please feel free to post in this thread and/or PM me.
Last edited by sbm12; Aug 15, 2015 at 11:30 am Reason: Adding more
 Oct 21, 2007, 8:19 am
#2
A FlyerTalk Posting Legend
Original Poster
Join Date: Apr 2001
Location: PSM
Posts: 69,232
Generic Hosting
For those of you who host your pictures on your own server or some other generic site, here's the scoop for you...
Go to a page that has the photo displayed. Right-click on the image and choose properties. In that screen that pops up is a section called "Address (URL)." Even though it doesn't really look like it, you can actually click in the space on the right side of that dialog. Click in the middle of the address (the part that starts with "http://") and then press Ctrl-A to select all. This is safer than trying to select it with the mouse as the URL may scroll off the view and you might miss some of it. Once the whole URL is highlighted you can right-click on it and choose "Copy" from the menu that pops up. Come back over here and paste that information into the image tag and you're all set.
This is same basic process that the instructions for most of the other services are based on, though each of them have some caveats for the particular host.
Last edited by sbm12; Nov 13, 2008 at 1:54 pm Reason: Finally put the info online.
Oct 21, 2007, 8:19 am
#3
A FlyerTalk Posting Legend
Original Poster
Join Date: Apr 2001
Location: PSM
Posts: 69,232
flickr
Updated flickr instructions are now at post 210.
Be careful when posting images from flickr - they have some specific rules on how they are supposed to be referenced, including that you are supposed to have a link back to the original gallery. To account for that make sure that you're including the HREF tag as described below.
In your flickr account, pick the image you want to share (http://www.flickr.com/photos/12159002@N08/1468355819/). Then click on the "All Sizes" button just above the image (http://www.flickr.com/photo_zoom.gne...8355819&size=l). At the bottom of that page there is a heading "To link to this photo on other websites you can either:" and then a text box under number 1. Copy the text from that box (remeber, you need to use this version to be compliant with their ToS for linking, and you'll end up with something like this:
That code would work on a "normal" web page, but not so much on FlyerTalk, so we'll need to adjust it a bit.
The first line is the "a href" tag. This is replaced with the URL tag on FlyerTalk, and the greater than/less than tag enclosures are replaced with square brackets. So the code will change from
<a href="http://www.flickr.com/photos/12159002@N08/1468355819/" title="Photo Sharing">img tag here</a> to [URL="http://www.flickr.com/photos/12159002@N08/1468355819/"]
img tag here
[/URL]
Fixing the image tag is pretty straightforward as well. FlyerTalk doesn't use the "src=" part of the tag, nor the size dimensions nor the "alt" text. Also, the FlyerTalk IMG tag doesn't like it when the URL for the image is surrounded with quotes. Stripping all that out we go from this:
<img src="http://farm2.static.flickr.com/1230/1468355819_38dc73612a.jpg" width="500" height="375" alt="Larry gives cigarman a pair of F seats!" /> to [IMG]http://farm2.static.flickr.com/1230/1468355819_38dc73612a.jpg[/IMG]
This code will give you this:

That's all there is to it!
For those of you using FireFox, there is an easier way with the GreaseMonkey script described below (originally noted here):
Be careful when posting images from flickr - they have some specific rules on how they are supposed to be referenced, including that you are supposed to have a link back to the original gallery. To account for that make sure that you're including the HREF tag as described below.
In your flickr account, pick the image you want to share (http://www.flickr.com/photos/12159002@N08/1468355819/). Then click on the "All Sizes" button just above the image (http://www.flickr.com/photo_zoom.gne...8355819&size=l). At the bottom of that page there is a heading "To link to this photo on other websites you can either:" and then a text box under number 1. Copy the text from that box (remeber, you need to use this version to be compliant with their ToS for linking, and you'll end up with something like this:
Code:
<a href="http://www.flickr.com/photos/12159002@N08/1468355819/" title="Photo Sharing">
<img src="http://farm2.static.flickr.com/1230/1468355819_38dc73612a.jpg" width="500" height="375" alt="Larry gives cigarman a pair of F seats!" />
</a>
The first line is the "a href" tag. This is replaced with the URL tag on FlyerTalk, and the greater than/less than tag enclosures are replaced with square brackets. So the code will change from
<a href="http://www.flickr.com/photos/12159002@N08/1468355819/" title="Photo Sharing">img tag here</a> to [URL="http://www.flickr.com/photos/12159002@N08/1468355819/"]
img tag here
[/URL]
Fixing the image tag is pretty straightforward as well. FlyerTalk doesn't use the "src=" part of the tag, nor the size dimensions nor the "alt" text. Also, the FlyerTalk IMG tag doesn't like it when the URL for the image is surrounded with quotes. Stripping all that out we go from this:
<img src="http://farm2.static.flickr.com/1230/1468355819_38dc73612a.jpg" width="500" height="375" alt="Larry gives cigarman a pair of F seats!" /> to [IMG]http://farm2.static.flickr.com/1230/1468355819_38dc73612a.jpg[/IMG]
This code will give you this:
That's all there is to it!
For those of you using FireFox, there is an easier way with the GreaseMonkey script described below (originally noted here):
Just to reply to myself, but in helping out with a Flickr question over in the in-flight photos I found an easier way to get Flickr-friendly BBCode for linking to images:
this script ^
On the "all sizes" page for your photo, it adds an extra text box with the BBCode to display the image and have it link back to the Flickr photo page, per Flickr's rules.
Need to be using Firefox with Greasemonkey to have it work.
this script ^
On the "all sizes" page for your photo, it adds an extra text box with the BBCode to display the image and have it link back to the Flickr photo page, per Flickr's rules.
Need to be using Firefox with Greasemonkey to have it work.
Last edited by sbm12; Dec 24, 2014 at 7:46 am Reason: Filling in the information
Oct 21, 2007, 8:20 am
#4
A FlyerTalk Posting Legend
Original Poster
Join Date: Apr 2001
Location: PSM
Posts: 69,232
Picassa Web Albums
In looking at my Picassa Web album I have the option when looking at an individual photo to "link to this photo" in the right side toolbar. I end up with a link that looks like this when I click on that option:
There are a couple important pieces in there that are useful. First, you don't actually want the "A HREF=" tag, so that should be deleted, as should the /a tag that closes it (the stuff in red), leaving you with this:
The other important bit is the s400 that I bolded & made green above. That part of the URL controls the size that the image is rendered in. The acceptable values are s144, s288, s400, s640, s720 and s800.
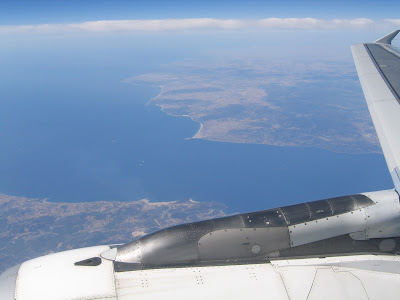
Using the above process I end up with the following URL for your picture of crossing the Straits of Gibraltar:
Putting that in the image tags in this forum renders this:
The other way to get the correct URL for the image would be to right-click on it and choose properties. In the "Address (URL)" field you'll have something that looks like this:
That is basically the same URL, but with the size information at the end rather than at the beginning. If you choose that format you still have to use a "valid" value for the image size, which is the same set of numbers that I listed above (and there may be others but those are the ones I know work).
Image courtesy of AC110, from the View from Your Hotel Room thread.
Code:
<a href="http://picasaweb.google.com/kraft.michaels/Reunion2006/photo#5063697458581166914">
<img src="http://lh3.google.com/kraft.michaels/RkXeAozHW0I/AAAAAAAAACU/-B3YJfDAa88/s400/IMG_1074.JPG" />
</a>
Code:
<img src="http://lh3.google.com/kraft.michaels/RkXeAozHW0I/AAAAAAAAACU/-B3YJfDAa88/s400/IMG_1074.JPG" />
Using the above process I end up with the following URL for your picture of crossing the Straits of Gibraltar:
Code:
http://lh6.google.com/rob.scaife/RxocR7lAotI/AAAAAAAACMs/LczZn9DOpfw/s400/IMG_2008.jpg
The other way to get the correct URL for the image would be to right-click on it and choose properties. In the "Address (URL)" field you'll have something that looks like this:
Code:
http://lh6.google.com/rob.scaife/RxocR7lAotI/AAAAAAAACMs/LczZn9DOpfw/IMG_2008.jpg?imgmax=720
Image courtesy of AC110, from the View from Your Hotel Room thread.
Last edited by sbm12; Oct 21, 2007 at 8:36 am Reason: Filling in the information
Oct 21, 2007, 8:20 am
#5
A FlyerTalk Posting Legend
Original Poster
Join Date: Apr 2001
Location: PSM
Posts: 69,232
SmugMug
Click on the particular picture you want to share so that you are viewing only that shot, not a gallery or thumbnails or whatnot. Click on the Share button above the image and then choose the Get a Link option from that menu. On the resulting page click on the Embeddable Links tab. Choose the BBCode-Medium option at the bottom and you'll get the following code:

And the image is set to link to the ightBox view back in the original gallery.
You do have to make sure that you have SumgMug set up to allow linking to your image libraries from their system, but it is set that way by default, so that probably isn't the issue.
[url=http://gallery.millerworks.net/Architecture/Buildings-Skylines/3554450_DXBHW/1/#201369877_5QRVw-A-LB][img]http://gallery.millerworks.net/photos/201369877_5QRVw-M-1.jpg[/img][/url]
When pasted into a post that will result in the following:And the image is set to link to the ightBox view back in the original gallery.
You do have to make sure that you have SumgMug set up to allow linking to your image libraries from their system, but it is set that way by default, so that probably isn't the issue.
Last edited by sbm12; Sep 17, 2009 at 4:58 pm Reason: Filling in the information
Oct 21, 2007, 8:21 am
#6
A FlyerTalk Posting Legend
Original Poster
Join Date: Apr 2001
Location: PSM
Posts: 69,232
PhotoBucket
This information was provided by boxo ^^
As a low-tech person, I chose Photobucket to host the photos I publicly post here on FT. It's very easy.
As a low-tech person, I chose Photobucket to host the photos I publicly post here on FT. It's very easy.
- Click the "my album" tab.
- Upload your photo(s).
- Once upload is complete, scroll down and click on the individual image.
- Located in the upper left corner of your image, click the drop down menu "Edit Image". Choose "resize".
- After photo loads, click "Preset Sizes" ==> "Large" or "15" Screen" ==> "Apply" ==> "Save" ==> "Overwrite existing..." or "Save new copy".
- Scroll down for the list of codes. A single left mouse click on "IMG Code" automatically copies.
- Paste the code into the body of your thread reply and you're done!
Last edited by sbm12; Dec 4, 2008 at 10:08 am Reason: new instructions, per post 17
Oct 21, 2007, 8:26 am
#7
A FlyerTalk Posting Legend
Original Poster
Join Date: Apr 2001
Location: PSM
Posts: 69,232
fotiki
It looks like there is a user or two who have their pictures on fotiki, so here are instructions for using their service. This one is actually pretty difficult, so not for the faint of heart. That being said, it does work.
To get the URL of the image you need to view the source of the HTML page that the image is on. Using an example from Seat2A's collection, here is the link to the main display page.
Once on the page you cannot get the properties of the picture by right-clicking on it - you'll see a message pop-up indicating that it is protected. Instead, choose the appropriate option to view the HTML source for the page. This will depend on the version of the browser that you are using, but generally is available from View | Source on the menus or right-click on a blank space in the page and choose the View Source option on the menu there. That should open up notepad with a whole bunch of HTML code in it. Here's where things get complicated.
The image source information that you are looking for can be found between <td id="wrap9"> and id="stretch_photo_id" in the text file that is displayed. Starting at the <td id="wrap9"> bit here is an excerpt of the HTML code:
In that chunk of text is an "img src=" tag. The URL that you want is that one, but you need to EXCLUDE the question mark and the number following it. I've bolded it and made it red in the example above. That is the code that you'd paste in the img tag here on FlyerTalk.
If you want to be fancy and have your image clickable to link back to the fotiki gallery, which is actually pretty cool, you can combine the original link that we used to find the image source with the IMG tag and come up with something like the following:
[URL="http://public.fotki.com/Seat2A/greetings-from-the-/eveningsunsetfrom38000.html"]
[IMG]http://images32.fotki.com/v1061/photos/2/211932/5833818/EVENINGSUNSETFROM38000-vi.jpg[/IMG]
[/URL]
So in the end you have a image that looks and links like this:
Shout out to Seat 2A for supplying this and many other great shots from in the air.
To get the URL of the image you need to view the source of the HTML page that the image is on. Using an example from Seat2A's collection, here is the link to the main display page.
Once on the page you cannot get the properties of the picture by right-clicking on it - you'll see a message pop-up indicating that it is protected. Instead, choose the appropriate option to view the HTML source for the page. This will depend on the version of the browser that you are using, but generally is available from View | Source on the menus or right-click on a blank space in the page and choose the View Source option on the menu there. That should open up notepad with a whole bunch of HTML code in it. Here's where things get complicated.
The image source information that you are looking for can be found between <td id="wrap9"> and id="stretch_photo_id" in the text file that is displayed. Starting at the <td id="wrap9"> bit here is an excerpt of the HTML code:
Code:
<td id="wrap9"> <a href="inflightsydsin3.html" title="EVENING SUNSET FROM 38000.jpg">
<img src="http://images32.fotki.com/v1061/photos/2/211932/5833818/EVENINGSUNSETFROM38000-vi.jpg?1200983326"
alt="EVENING SUNSET FROM 38000.jpg" id="stretch_photo_id" galleryimg="no" galleryimg="false"></a>
If you want to be fancy and have your image clickable to link back to the fotiki gallery, which is actually pretty cool, you can combine the original link that we used to find the image source with the IMG tag and come up with something like the following:
[URL="http://public.fotki.com/Seat2A/greetings-from-the-/eveningsunsetfrom38000.html"]
[IMG]http://images32.fotki.com/v1061/photos/2/211932/5833818/EVENINGSUNSETFROM38000-vi.jpg[/IMG]
[/URL]
So in the end you have a image that looks and links like this:
Shout out to Seat 2A for supplying this and many other great shots from in the air.
Last edited by sbm12; Dec 4, 2008 at 10:15 am Reason: added content
Oct 21, 2007, 8:27 am
#8
A FlyerTalk Posting Legend
Original Poster
Join Date: Apr 2001
Location: PSM
Posts: 69,232
Webshots
On the page for any image there is a link to "link to it" that you can click on. On that page, there is a dialog with three rows of text boxes and some tabs above them. Select the size you want the image to be from the tabs (I recommend 500 or 600). Then copy all the text in the bottom of the three boxes - the one labeled "post in a forum" - and paste it here.
I randomly started on this page (http://outdoors.webshots.com/photo/1...62814050OEkqYH) and following the above steps I got this code:
[URL=http://outdoors.webshots.com/photo/1234419121062814050OEkqYH]
[IMG]http://inlinethumb44.webshots.com/34219/1234419121062814050S500x500Q85.jpg[/IMG]
[/URL]
When pasted into this forum that gives the following result:
Last edited by sbm12; Dec 4, 2008 at 10:16 am
Oct 21, 2007, 9:06 am
#10
A FlyerTalk Posting Legend
Original Poster
Join Date: Apr 2001
Location: PSM
Posts: 69,232
Photoshop Express
Now that Photoshop Express is online and running, I figured I'd put together the instructions for their site as well. Before deciding that it is the right solution for you, make sure to check out the thread about the service here. There are some interesting copyright issues that you'll face if you use them.
Anyways, now that you've got your images uploaded and edited and all perfect, it is time to share them. In the main window, find the image that you want to share. If you hover the mouse over the bottom of the image the "Photo Options" dropdown will show up. When you click on it you'll get a menu like this:

While the "Link" and "Embed" options are great for quick-clicking, the "Download" option gives you the most flexibility, so I recommend clicking on that. It will give you this dialog:

The great thing about this view is that it will show you all the sizes you can choose from for sharing the image. Pick the size you want (800 wide is the recommended max here so as to not screw up the table display) and then click on the "LINK" button at the bottom of the dialog. A small pop-up will indicate that the HTML code has been copied. Head back over to FlyerTalk and in the appropriate post click the "Insert Image" button. Erase the contents of that box (it probably has "http://" pre-populated) and then choose paste via your favorite method (Ctrl-V, Shift-Insert, right-click, etc.). A pretty long URL that looks something like this will show up in the box.
http://api.photoshop.com/home_666bd09965f84f0e86b3ae8e9d5ae000/adobe-px-assets/3eda32642c3c4fad96393a7e61260f5c.
Click OK and you're all set. That image will now appear in your post.
One problem I've noticed with the Photoshop Express site (in my admittedly brief usage so far this morning) is that it auto-scales too small or too large. There is a ~256ish pixel thumbnail and then 1024 pixels and larger. That makes it hard to get a good size to share here. Since the 1024 will mess up the tables, I still recommend the 256ish thumbnail for display, but with the added feature of making it a link back to a larger sized image. Sadly, it does not appear possible to link to a specific image in a gallery or album view (the link just goes to a slideshow), so I don't really like that approach. Instead, I've come up with a scheme that lets you display the small image and link to the bigger one. It isn't in the gallery view, but such is life. Here's how it works. Start with the instructions above. Once you've completed them you'll have something that looks like this:
[IM G]http://api.photoshop.com/home_666bd09965f84f0e86b3ae8e9d5ae000/adobe-px-assets/3eda32642c3c4fad96393a7e61260f5c[/IMG]
Go back into the Download dialog and put the radio selector on a larger version of the image, like the 1024 or original size. Now click the "Link" button again. Switch back over to FlyerTalk and highlight the entire image embedding post, including the [IMG] and [/IMG] tags. Click the "Insert Link" button on the toolbar. Erase the http:// that is already in that window and then paste. You'll get another long string that is slightly different than the first one. Click OK and you'll now see that the IMG has been surrounded with URL tags. Now the link is clickable.
Following these instructions I have the following:
Thumbnail URL: http://api.photoshop.com/home_666bd09965f84f0e86b3ae8e9d5ae000/adobe-px-thumbnails/3c720c0c2fe1414180c1bdecc5a9f3e1/256.jpg
Big URL: http://api.photoshop.com/home_666bd09965f84f0e86b3ae8e9d5ae000/adobe-px-thumbnails/3c720c0c2fe1414180c1bdecc5a9f3e1/1024.jpg
UBB Code:
[URL="http://api.photoshop.com/home_666bd09965f84f0e86b3ae8e9d5ae000/adobe-px-thumbnails/3c720c0c2fe1414180c1bdecc5a9f3e1/1024.jpg"]
[IMG]http://api.photoshop.com/home_666bd09965f84f0e86b3ae8e9d5ae000/adobe-px-thumbnails/3c720c0c2fe1414180c1bdecc5a9f3e1/256.jpg[/IMG]
[/URL]
That will render like this:

And if you click on the above link you'll get a version of the image that is 1024 px wide.
That's all there is to it!
And for those who are curious, I chose a blurry image on purpose. No need for me to give Adobe rights to a decent image I have...
Anyways, now that you've got your images uploaded and edited and all perfect, it is time to share them. In the main window, find the image that you want to share. If you hover the mouse over the bottom of the image the "Photo Options" dropdown will show up. When you click on it you'll get a menu like this:
While the "Link" and "Embed" options are great for quick-clicking, the "Download" option gives you the most flexibility, so I recommend clicking on that. It will give you this dialog:
The great thing about this view is that it will show you all the sizes you can choose from for sharing the image. Pick the size you want (800 wide is the recommended max here so as to not screw up the table display) and then click on the "LINK" button at the bottom of the dialog. A small pop-up will indicate that the HTML code has been copied. Head back over to FlyerTalk and in the appropriate post click the "Insert Image" button. Erase the contents of that box (it probably has "http://" pre-populated) and then choose paste via your favorite method (Ctrl-V, Shift-Insert, right-click, etc.). A pretty long URL that looks something like this will show up in the box.
http://api.photoshop.com/home_666bd09965f84f0e86b3ae8e9d5ae000/adobe-px-assets/3eda32642c3c4fad96393a7e61260f5c.
Click OK and you're all set. That image will now appear in your post.
One problem I've noticed with the Photoshop Express site (in my admittedly brief usage so far this morning) is that it auto-scales too small or too large. There is a ~256ish pixel thumbnail and then 1024 pixels and larger. That makes it hard to get a good size to share here. Since the 1024 will mess up the tables, I still recommend the 256ish thumbnail for display, but with the added feature of making it a link back to a larger sized image. Sadly, it does not appear possible to link to a specific image in a gallery or album view (the link just goes to a slideshow), so I don't really like that approach. Instead, I've come up with a scheme that lets you display the small image and link to the bigger one. It isn't in the gallery view, but such is life. Here's how it works. Start with the instructions above. Once you've completed them you'll have something that looks like this:
[IM G]http://api.photoshop.com/home_666bd09965f84f0e86b3ae8e9d5ae000/adobe-px-assets/3eda32642c3c4fad96393a7e61260f5c[/IMG]
Go back into the Download dialog and put the radio selector on a larger version of the image, like the 1024 or original size. Now click the "Link" button again. Switch back over to FlyerTalk and highlight the entire image embedding post, including the [IMG] and [/IMG] tags. Click the "Insert Link" button on the toolbar. Erase the http:// that is already in that window and then paste. You'll get another long string that is slightly different than the first one. Click OK and you'll now see that the IMG has been surrounded with URL tags. Now the link is clickable.
Following these instructions I have the following:
Thumbnail URL: http://api.photoshop.com/home_666bd09965f84f0e86b3ae8e9d5ae000/adobe-px-thumbnails/3c720c0c2fe1414180c1bdecc5a9f3e1/256.jpg
Big URL: http://api.photoshop.com/home_666bd09965f84f0e86b3ae8e9d5ae000/adobe-px-thumbnails/3c720c0c2fe1414180c1bdecc5a9f3e1/1024.jpg
UBB Code:
[URL="http://api.photoshop.com/home_666bd09965f84f0e86b3ae8e9d5ae000/adobe-px-thumbnails/3c720c0c2fe1414180c1bdecc5a9f3e1/1024.jpg"]
[IMG]http://api.photoshop.com/home_666bd09965f84f0e86b3ae8e9d5ae000/adobe-px-thumbnails/3c720c0c2fe1414180c1bdecc5a9f3e1/256.jpg[/IMG]
[/URL]
That will render like this:

And if you click on the above link you'll get a version of the image that is 1024 px wide.
That's all there is to it!
And for those who are curious, I chose a blurry image on purpose. No need for me to give Adobe rights to a decent image I have...
Last edited by sbm12; Dec 4, 2008 at 10:18 am
Oct 21, 2007, 9:07 am
#11
A FlyerTalk Posting Legend
Original Poster
Join Date: Apr 2001
Location: PSM
Posts: 69,232
Zenfolio
As far as I know only rkkwan uses this service, but he wrote up the instructions, so here they are.
i used Zenfolio.com to host my pictures, and the procedure is pretty easy to link pics from there.
When one is seeing a pic from a gallery, like this one there is a button on upper right that says "Send Link." The owner of the page will be presented with direct links of various resolution after logged in. The "Large" resolution of about 800x534 seems to be pretty good for this forum. The link for that above photo will be:
http://rkkwan.zenfolio.com/img/v0/p755908229-4.jpg
and when embedded in the post, it should come out fine.
If you want to make the image a clickable link, use a combination of the IMG and URL tags. The URL tag should be for the main link and the IMG tag for the specific link that you pick from the dialog that you get. For rkkwan's image the UBB code would look like this:
[URL="http:/ /rkkwan.zenfolio.com/p721105124/?photo=755908229"][I MG]http:/ /rkkwan.zenfolio.com/img/v0/p755908229-4.jpg[/IMG][/URL] which will result in this showing up in the post:
Last edited by sbm12; Dec 4, 2008 at 10:19 am
Oct 21, 2007, 12:22 pm
#12
Join Date: Jun 2004
Location: The People's Republik of MSN
Programs: After years of status, back to Peon levels. Anti-Apostheid Platinum, PWP CentCom
Posts: 4,767
Be careful when posting images from flickr - they have some specific rules on how they are supposed to be referenced, including that you are supposed to have a link back to the original gallery. To account for that make sure that you're including the HREF tag as described below.
In your flickr account, pick the image you want to share (http://www.flickr.com/photos/12159002@N08/1468355819/). Then click on the "All Sizes" button just above the image (http://www.flickr.com/photo_zoom.gne...8355819&size=l). At the bottom of that page there is a heading "To link to this photo on other websites you can either:" and then a text box under number 1. Copy the text from that box (remeber, you need to use this version to be compliant with their ToS for linking, and you'll end up with something like this:
That code would work on a "normal" web page, but not so much on FlyerTalk, so we'll need to adjust it a bit.
The first line is the "a href" tag. This is replaced with the URL tag on FlyerTalk, and the greater than/less than tag enclosures are replaced with square brackets. So the code will change from
to
(no spaces normally, but needed here to render the code correctly)
Fixing the image tag is pretty straightforward as well. FlyerTalk doesn't use the "src=" part of the tag, nor the size dimensions nor the "alt" text. Also, the FlyerTalk IMG tag doesn't like it when the URL for the image is surrounded with quotes. Stripping all that out we go from this:
to
(Note that I included the leading " in the sample above to make it render correctly. Don't use it in your actual post!!)
This code will give you this:
That's all there is to it!
In your flickr account, pick the image you want to share (http://www.flickr.com/photos/12159002@N08/1468355819/). Then click on the "All Sizes" button just above the image (http://www.flickr.com/photo_zoom.gne...8355819&size=l). At the bottom of that page there is a heading "To link to this photo on other websites you can either:" and then a text box under number 1. Copy the text from that box (remeber, you need to use this version to be compliant with their ToS for linking, and you'll end up with something like this:
Code:
<a href="http://www.flickr.com/photos/12159002@N08/1468355819/" title="Photo Sharing">
<img src="http://farm2.static.flickr.com/1230/1468355819_38dc73612a.jpg" width="500" height="375" alt="Larry gives cigarman a pair of F seats!" />
</a>
The first line is the "a href" tag. This is replaced with the URL tag on FlyerTalk, and the greater than/less than tag enclosures are replaced with square brackets. So the code will change from
Code:
<a href="http://www.flickr.com/photos/12159002@N08/1468355819/" title="Photo Sharing">img tag here</a>
Code:
[ URL="http://www.flickr.com/photos/12159002@N08/1468355819/" ]
img tag here
[ /URL ]
Fixing the image tag is pretty straightforward as well. FlyerTalk doesn't use the "src=" part of the tag, nor the size dimensions nor the "alt" text. Also, the FlyerTalk IMG tag doesn't like it when the URL for the image is surrounded with quotes. Stripping all that out we go from this:
Code:
<img src="http://farm2.static.flickr.com/1230/1468355819_38dc73612a.jpg" width="500" height="375" alt="Larry gives cigarman a pair of F seats!" />
Code:
[IMG]"http://farm2.static.flickr.com/1230/1468355819_38dc73612a.jpg[/IMG]
This code will give you this:
That's all there is to it!
http://www.flyertalk.com/forum/showp...8&postcount=42 - it adds an extra box on the photo page with FT-friendly BBCode.
Oct 21, 2007, 1:06 pm
#13
A FlyerTalk Posting Legend
Original Poster
Join Date: Apr 2001
Location: PSM
Posts: 69,232
FlyerTalk Picture Albums
That's right...FlyerTalk now allows you to have photo albums as part of your user profile. And it looks like you can use that to host images that you want to post on here. IT seems to require a FlyerTalk Premium membership, which will also get rid of the ads on the pages. Not a bad $12/2 years investment, IMO.
To create an album click on the My FlyerTalk link at the top of the page and then click the "Pictures & Albums" link. Follow the links there to create the album and upload the pictures. Make sure that you mark the album as public or links won't work.
Once the images are uploaded, simply click on one of the pictures and on that page at the bottom you'll see an entry that says BB Code. Select the text in that box and paste it into the post. The code will look like this:
[IMG]http://www.flyertalk.com/forum/picture.php?albumid=33&pictureid=213[/IMG]
And it will result in this:

Please note- These instructions are for FlyerTalk Albums. There is a completely different beast known as FlyerTalk Galleries (I had no idea until I got a PM about it tonight (11.15.08) so these instructions will NOT work for Galleries. I'm working on those instructions, or I will be once I get home from my current MR.
To create an album click on the My FlyerTalk link at the top of the page and then click the "Pictures & Albums" link. Follow the links there to create the album and upload the pictures. Make sure that you mark the album as public or links won't work.
Once the images are uploaded, simply click on one of the pictures and on that page at the bottom you'll see an entry that says BB Code. Select the text in that box and paste it into the post. The code will look like this:
[IMG]http://www.flyertalk.com/forum/picture.php?albumid=33&pictureid=213[/IMG]
And it will result in this:
Please note- These instructions are for FlyerTalk Albums. There is a completely different beast known as FlyerTalk Galleries (I had no idea until I got a PM about it tonight (11.15.08) so these instructions will NOT work for Galleries. I'm working on those instructions, or I will be once I get home from my current MR.
Last edited by sbm12; Dec 4, 2008 at 10:19 am
Oct 24, 2007, 8:00 pm
#14
FlyerTalk Evangelist
Join Date: May 2002
Location: Pittsburgh
Programs: MR/SPG LT Titanium, AA LT PLT, UA SLV, Avis PreferredPlus
Posts: 31,009
Now that Smugmongous has been implemented, Smugmug also has XL (1024), XL2 (1280), and XL3 (1600) sizes so those with big monitors can see your images in full glory.
Last edited by CPRich; Oct 31, 2007 at 7:42 am
Oct 28, 2007, 7:04 pm
#15
A FlyerTalk Posting Legend
Original Poster
Join Date: Apr 2001
Location: PSM
Posts: 69,232

Also, I updated the generic post instructions up top.